Today I set out to see if Windows 7 would run MS Flight Simulator X any better than Windows XP did. I found that Windows XP on my Mac Pro (Dual Xeon with 10GB of ram) ran very sluggish. Partly because Windows XP (32-Bit) would only recognize about 3.5 Gig of the 10GB of ram that was installed in the machine. So since I recently got a Technet subscription (I seem to have to do a little more Windows stuff now at work, so thought I might as well learn what I have to manage) I downloaded the Windows Ultimate 7 to see how it would perform before going out and buying it. So I did a Time Machine backup of my data on my Mac Pro and then inserted in the Windows 7 disc and hit the “go”. It took a couple of hours to do the install, patch it, update boot camp stuff and install Flight Simulator. Once it was installed I was impressed that it actually performed much better than it did on Windows XP. I could actually turn the graphics stuff up on it and almost run it at 1900×1200 with out any jerking around. I then did a couple of flights and then it was time to boot back in to MacOS to get some real work done. This is when I about lost it..
See when I booted windows 7 it had found the other 3 data drives that were all HFS+ drives in my Mac. It decided to assign a drive letter to them all. I went in and un did that as I did not want Windows to touch those drives. I thought all was well, until I booted in to MacOS. When I logged in, it told me that the drives could not be read, and it couldn’t find my home directory (which was one of those drives). I was PISSED! So the first thing I did was pop up the disk utility and this is what I saw (minus the 2 1TB seagate drives):
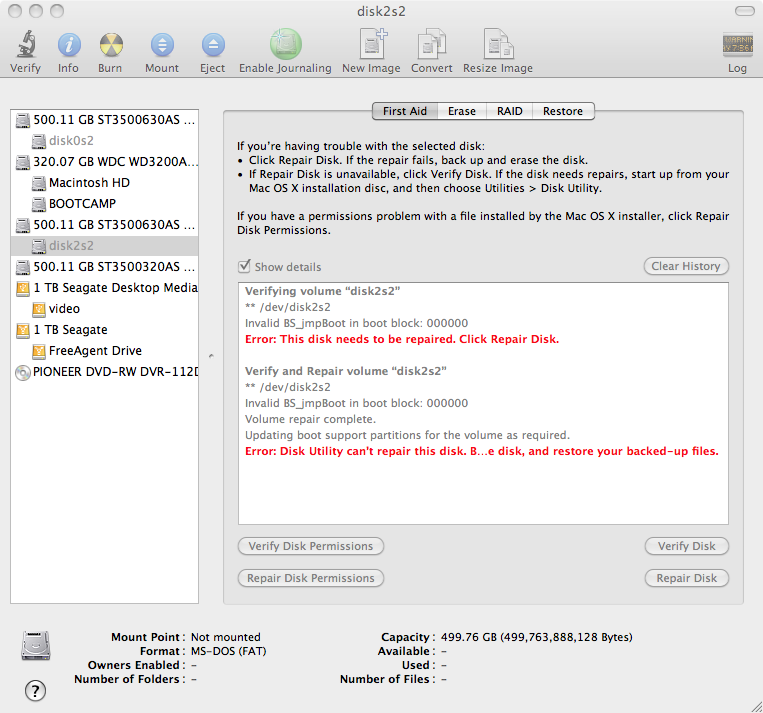
What pissed me off was that every partition I clicked on, it said it was an MS-DOS partition. Surely Windows didn’t screw around and format all my drives.. I was at a loss, all my data was on there, 20,000+ pictures, all the video I was working on, everything… So I decided to see what I could see from the command line. So off to the command line, and I ran the “diskutil list” command and saw this:
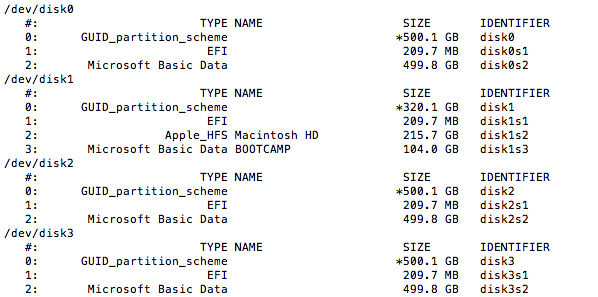
Yup, Micro$oft had screwed with my partitions.. So I was hoping that maybe it just changed the partition type and my data was still there. So I poked around to see if there was a way to change the partition type. In the gui tool, the only way to do it is to “format” it over, which meant I would loose everthing, and I didn’t have any backups, as the disk2 in there was my Time Machine backup drive. So thinking to my Solaris side, I knew there was a program called “fstyp” that would tell you what a particular disk slice was formated as. So I gave it a shot and MacOS has that program:
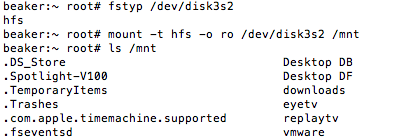
So I ran the fstyp util againest one of the slices, and it came back saying it was HFS… Hot diggity dog.. Maybe my data is still all there.. So I did a mount on it as readonly and it worked. I could see all the data on the drive. So I immediatly started copying data from the drive to an external USB drive (the first 1TB seagate drive in the picture above). But the problem now was, I had 3 x 500GB harddrives of information. The 1TB drive only had about 400GB free. So off to Best Buy and I picked up a Seagate 1TB Firewire drive. Brought it home and mounted up the other partitions and started copying the data. It has been going on for about 2 hours or more now on the copy. I will say that the Seagate Firewire 800 drive is spanking the ass off of the Seagate USB drive.
Once I have backed up all the data.. (Hint use the ditto command) I will see if there is a way to change the partition type with out reformatting the drive. If there isn’t then I will have to reformat and then ditto the data back on to the Internal drives..
Hopefully this will help some one else if they get the same problem, and it (MacOS) tells you “you must initialize the drive”. DONT. Tell it to cancel and then you can save your data.. If you initialize it, you may end up loosing all your data.
—Update
As I waited for the data to finish copying I decided to test some stuff on my time machine drive. I read a bunch on the GUID labels that are on the disks. Using the gpt command i did a listing of the GUID info for the drive. Using that information I deleted the index 2 and added a new one with the Apple HFS GUID label:
gpt -r show /dev/disk2
gpt remove -i 2 /dev/disk2
gpt add -b 409640 -s 976101344 -i 2 -t "48465300-0000-11AA-AA11-00306543ECAC" /dev/disk2

In the above, you can see I removed index 2. As soon as I did that, this window popped up:
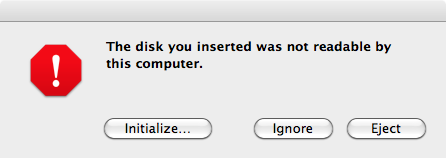
I just selected ignore on it. Then went on to put in the new GUID label which was the third command in the shot above. The numbers (409640, and 976101344) are taken from the line that has index 2 on it above. You MUST use the exact same numbers, otherwise you are going to change the partition size and may corrupt your data. The value after the -t is the GUID value for MacOS HFS (HFS+), which I found on http://en.wikipedia.org/wiki/GUID_Partition_Table, you can also see that the one that was listed before I removed it was a Windows Basic Data Partition.
As soon as I hit enter on the gpt command to add it in, the gui disk utility immediately changed and now showed me my data was there. It also mounted the disk like nothing had happened.
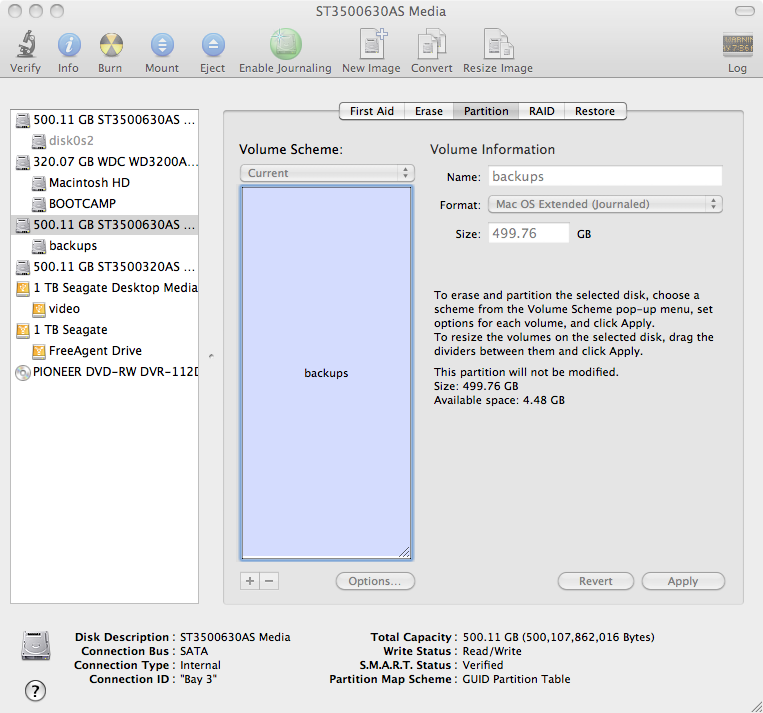
I am going to wait till the copying is done and then do the other two drives and then I should be back to where I was before I installed Windows 7.
More info on the Apple GPT is at : http://developer.apple.com/mac/library/technotes/tn2006/tn2166.html


